Thursday, 13 September 2012

Make Tissue Pom-poms

This 'make' was a bit fiddly for Amelie (who is three years old), however she joined in where she could and enjoyed decorating her room with the end product!

Tissue Pom-poms
These tissue paper pom-poms are great for decorating gifts, brightening a lamp shade or use them for festival decorations. They look brilliant in pastel shades for Easter or green and red for Christmas. 

Time taken for us to make: 45 minutes to make five

Cost to me: £0.99 - I bought a pack of 100 sheets of brightly coloured tissue paper for 99p in a cheap bookshop. 

Original instructions

What we used: 
  • Scissors 
  • Pencil
  • Needle and thread
  • Several different coloured sheets of tissue paper 
  • An empty fruit pot

What we did: 

We took 2 pieces of tissue paper in different colours and folded them together a couple of times to make several layers. We then drew around a fruit pot to make a perfect circle and then cut it out to create 8 circles of tissue paper, 4 in each colour. 

Fold sheets together and draw around the fruit pot

Cut out the circles, 4 of each colour
We then folded each circle in half and then quarters. Amelie helped with this bit. 

Fold circles in half...
and the quarters


To attach the circles to each other we threaded a needle and tied a large knot on the end. We threaded each folded circle through the corner onto the cotton, alternating the colours. A large knot was tied to secure them. 

Thread each circle onto the thread...
alternating colours 


The circles are secured with knots at each end

Now for the tricky bit... we carefully pulled each circle open forming a pom-pom. 


We then pegged the pom-poms to Amelie's lampshade - We think they look FABULOUS!

Monday, 10 September 2012

Make a Picture Jigsaw

This is a great rainy day activity. It's often on rainy days that puzzles are pulled out and scattered on the floor or across dining tables. But sadly after a while they just become too easy, and eventually a bit boring. Making your own will give you a new collection to challenge little minds. Amelie loves puzzles, so she really enjoyed making her own. 


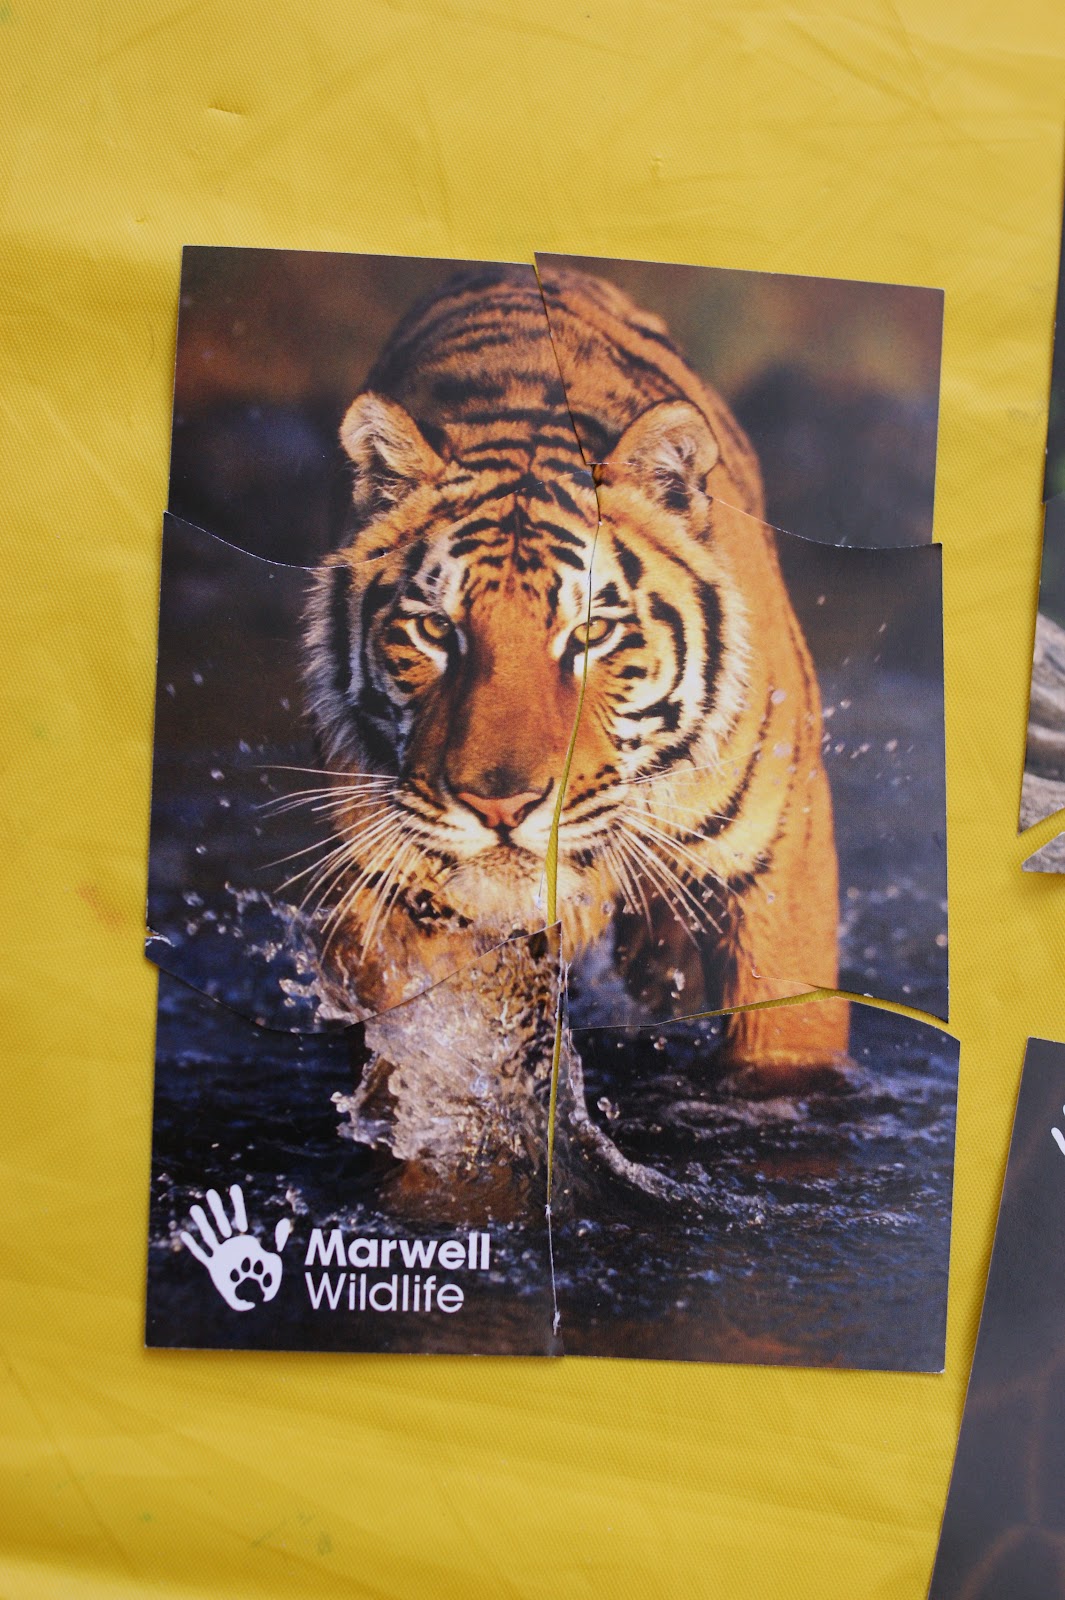
Making jigsaw puzzles simply requires a clear image on card. You can use anything, greetings cards, photos, postcards even cereal boxes. We chose to use postcards that we bought from a trip to the zoo. Our puzzles are a great keepsake from a lovely day out. 

Our postcards


Time taken for us to make: We made 5 in about 45 mins 

Cost to me: £1.50

Original Instructions

What we used: 
  • 5 x postcards 
  • Pen 
  • Scissors
  • Small paper bags 

What we did: 

On the reverse of the postcards we drew several wavey or straight lines and then cut along them to make the pieces. We made a different types, varying in difficulty to solve. 


Draw lines on the reverse

Cut along the lines

We then put each puzzle in their own paper bag and labelled them. You can use envelopes or plastic wallets.


Puzzles complete and stored

After dinner that evening Amelie enjoyed completing her new puzzles with her Dad (she shares her love of puzzles with Dan). 


These puzzles will be used time and time again. 

Friday, 7 September 2012

Readers 'Makes'

Just wanted to add a post to show everyone some great 'makes' pictures - I can hear Tony Hart introducing viewers artwork in The Gallery as I type... If you are a British child of the 70's or 80's you will undoubtedly remember a children's TV presenter called Tony Hart and his BRILLIANT art programmes such as Vision On and Hartbeat. He always encouraged viewers to send in their art which he would then show on his programmes in a section called 'The Gallery'. Anyway, enough reminiscing... don't even get me started on Neil Buchanan and 'Art Attack' - Love it.

Back to why we are here... We're so pleased that people are joining in!! Yay!

Amelie received an actual 'make' in the post from a lovely friend. Stephanie has been getting creative during her coffee break (you see, this isn't just about having fun with kids). This Coin Picture (see Blog Post: 07.08.12) was created using materials found in a desk drawer. Thank you Stephanie, we have stuck it in our Scrapbook (see Blog Post: 27.07.12) x


Another treat for us was seeing little Mia and her Mum Ren making Sock Puppets (see Blog post: 10.08.12). They created 'Sid' and 'Twinkle Toes' - Great names girls. Thank you for sending us your lovely pictures. 

Mia
Twinkle Toes & Sid 

We'd love to see more of our readers photos. You can send them to us via Facebook or Twitter x


Make a Potato Print AND a Carrot Print

This is a bit of a classic! I'm sure most of you reading this will remember making potato or vegetable prints at school or at home. Very simple and lots of fun.

Potato Print

Kids LOVE painting & playing with food, this combines the two! Printing is very satisfying for children who are still developing paintbrush skills as they get to create clear shapes instantly. Amelie loves using a brush to cover the potato in paint and then pressing it on the paper.  

Time taken for us to make it: 30 minutes

Cost to me: Nothing, already had potatoes in the cupboard

Potato Print Instructions
Carrot Print Instructions

What we used: 
  • 2 x Potatoes
  • 2 x Carrots 
  • Knife
  • Cookie Cutters
  • Paints 
  • Brush 
  • Paper

What we did: 

We cut the potatoes in half and cut a simple shape on the flat side of one half of the potato. Then we did the same with the other halves. 

To make the star shape I pushed a cookie cutter into the potato then cut away the edges. Taking the cutter away left a perfect star shape - A lot less fiddly than trying to cut one free hand.

Cookie cutter can help make neat shapes


Once the potatoes were cut we did the same with the carrots. 

Potato star, square, triangle & ridged circle


Carrot circle, square, triangle & bar


We then brushed paint onto the shapes and pressed them onto the paper. 


My potato print - 'Boxer' 

Amelie's potato print - 'Shapes' 

Amelie's carrot print

I think this will be a 'make' we will be doing time and time again. Very simple. 

Thursday, 30 August 2012

Forward Planning... Flower Pressing for 'Pressed-Flower Calendar'.

Today we made preparations for a 'Make' that we will be creating later in the year. To make a Pressed-Flower Calendar we need... pressed flowers!

We had to collect flowers now, while there is still a variety to choose from before the autumn sets in. If you don't have the time to do this within the next couple of weeks, you could collect a variety of leaves as they change to shades of red, orange, yellow and purple in the autumn.

We collected some wild flowers on the way home from the shops. There are lots of wild flowers / pretty weeds to be found next to paths. Just a note - Do keep an eye on your child as they dash around picking flowers... a neighbour could get very angry if their prized Begonias are pinched!

Our collection of flowers and leaves

After collecting our wild flowers, we ventured into our garden to carefully gather some leaves and blooms. 


You can buy a 'flower-press' from most craft stores or some toy or book shops. But we'll be using a pile of heavy books. To help keep the flowers in place as we transfer them to and from the bottom of the pile of books, I cut along the edges of a plastic wallet so it is only intact one side. You could use a magazine. I then placed a piece of paper in the wallet, upon which the flowers will be placed. We trimmed the stems of the flowers and then placed them facedown onto the paper.

Trimmed plastic wallet

Trimming the stems 


Flowers and leaves in place on paper 
 

When all of the flowers and leaves were in place, we added another sheet of paper on top and closed the plastic wallets. The wallets were then placed in the back cover of a large book and then heavy books were added on top. The pile of books are to be left for one week. We'll be leaving them until the flowers are needed as this will be the safest place for them.

Wallet placed in book
Heavy books were placed on top
We'll return to this in November or December when we'll be making the calendars as Christmas gifts.


Tuesday, 21 August 2012

Make a Mask

This 'Make' can be as quick or as time consuming as you wish. Making a mask uses the simplest of materials as the foundation, then you can add as much details as you like using a variety of different textures. You and your child's imagination can go wild, creating characters who you can then become once you mask is complete AND dry - a soggy mask caked in paint & glue is not as calming as a facial!

Our masks... we also made one for Daddy!
Making masks can help children develop their hand-eye coordination, painting and drawing technique, etc as do most crafts, but what is really beautiful about making masks is what you do with them afterwards. Role Play and Imaginative Play is very beneficial to children. It is said that playing 'make believe' with growing minds will help them build social skills, confidence and a sense of self. It will also encourage language skills, leadership skills, problem solving and an understanding of other peoples perspective. Above all... it's FUN!

With Notting Hill Carnival coming up this weekend, this is also an opportunity to teach children about world events. Masks are used around the world to tell or remind people of stories. They are also used in parades during significant holidays. Maybe you have a local carnival or parade coming up near you.

Time taken for us to make: 90 mins (but we did make three). 

Cost to me: Nothing, we had all of the materials around the house.

Original Instructions
What we used: 
  • Paper Plate 
  • Scissors 
  • String
  • Pencil 
  • Plastacine 
  • Paint & Glitter Glue Pen
  • Glue 
  • Coloured Paper 
  • Feathers 
  • String 
  • Scraps of felt 
Getting ready to start
What we did: 
First we drew faces on a the underside of the paper plates using a pencil. We then cut out the eyes and mouth. 
Draw a face on your plate
Cut out the eyes and mouth


We made small holes in each side of the mask using a pencil with a ball of plastacine underneath the plate to ease the pencil through safely (a classic Blue Peter tip). The holes are needed to tie the lengths of string through each, which will fasten around your head. Amelie was VERY excited to use her String-Holder Cat that we had made previously. 
With care make two holes on either side of the mask 

Amelie used her String-Holder Cat
Tie the string to your mask 

We then decorated the masks. Amelie chose to make a cat using felt and feathers for the ears, felt pen to colour the nose & glitter glue for the whiskers. She also added sequins for extra glamour!
I chose to go down the carnival route with a bright sun face. I used paint for the face and glitter glue for the features. Feathers were glued around the edge for the rays.
My second mask was a lion. I swirled the paintbrush to give the texture of fur then added a felt nose & glitter glue for the features (Have you noticed a theme here?... We do LOVE glitter glue pens). To create a full mane I tore orange and yellow paper into strips then wrapped them around a pen to make curls, then glued them around the edge.

Decorate your mask

Amelie's Cat Mask 
My Carnival Sun Mask 

My Lion Mask 


Swirly brush strokes to create texture
Amelie couldn't wait to show her Dad our masks. She was excited to tell him which mask he was to wear as he got through the door, home from work. We took turns trying each of them on whilst dinner was cooking. 

We'd love to see what creatures you create. You can send pictures to us via Facebook or Twitter